 OpenAI - ChatGPT, Sora
 Google - Gemini, Nano Banana
 Anthropic - Claude
 xAI - Grok
 Deepseek
 Alibaba - Qwen
 ByteDance - Doubao
 All Models
 Enterprise Plans
 AI Application Development
 AI Translator API
 AI SEO/GEO Service
 GEO-Optimized PR Service
 Web Scraping Service
 OpenClaw
 Top AI Tools
 Top AI Robots
 Log in
How to install and run OpenClaw (formerly Clawdbot and Moltbot) on QNAP Ubuntu Linux Station
Overview & Evolution
OpenClaw (formerly known as Clawdbot and Moltbot) represents the next generation of third-party automation and productivity tools. It is specifically designed to operate as a persistent "AI Agent" that works tirelessly on your behalf. Whether it's managing complex messaging workflows, triaging emails, syncing calendars, or executing local system commands, OpenClaw bridges the gap between conversational AI and functional system interaction.
The project's core philosophy—"an AI that actually does things"—is realized by connecting modern chat interfaces to a local runtime. By hosting this on a QNAP NAS, users benefit from 24/7 uptime, private data storage, and the robust processing power of a dedicated server environment.
The developer has renamed the project multiple times (Clawdbot → Moltbot → OpenClaw). While older documentation or community forums might still reference "Clawdbot" or "Moltbot," they all refer to the same powerful automation framework. This guide uses the latest "OpenClaw" terminology but is compatible with all legacy versions.
Security & Risk Considerations
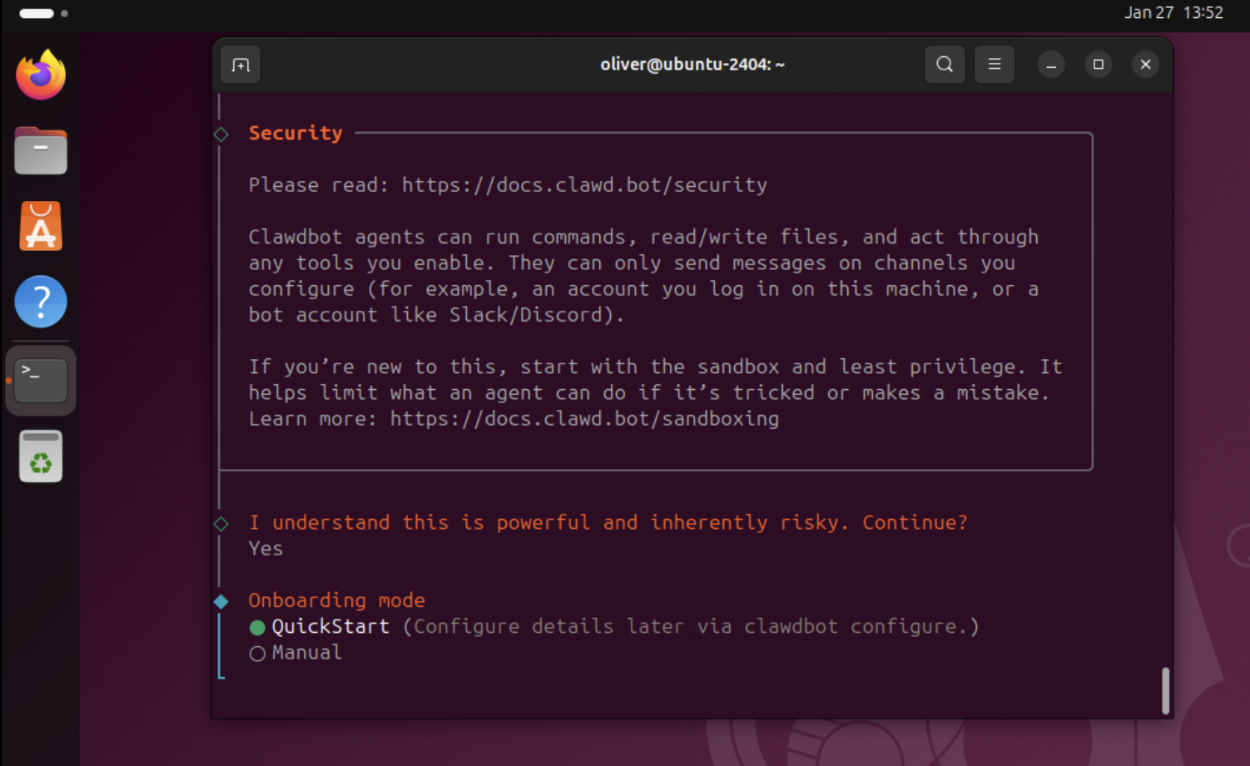
OpenClaw is a powerful automation tool that can access local files, execute commands, and utilize sensitive credentials such as API keys or tokens. Users must configure it with extreme caution and assume full responsibility for its deployment.
- Access Control: Do not expose the OpenClaw web interface directly to the public Internet. Use a VPN, IP allowlist, or strong authentication.
- Third-party Extensions: Only install skills or extensions from trusted sources to prevent data or credential theft.
- Isolation: Run OpenClaw in an isolated environment (like Ubuntu Linux Station) and avoid granting unnecessary root privileges.
- Credential Protection: Rotate API keys immediately if you suspect any exposure.
Best Practice: OpenClaw is intended for advanced or experimental use. Always review security implications before enabling unattended operations. Learn how QNAP ensures data security in Ubuntu Linux Station.
Why Deploy OpenClaw on NAS?
Integrating OpenClaw with your QNAP NAS opens up a variety of professional and personal automation scenarios that go far beyond simple chatbots.
Autonomous 24/7 Agent
Unlike desktop-based AI, running OpenClaw on a NAS ensures your agent is always online. It can monitor your incoming requests and execute tasks while your main computer is turned off.
DevOps & SysAdmin
Configure OpenClaw to run local bash scripts or monitor system health. You can "chat" with your server to check disk space, restart containers, or backup databases via simple commands.
Personal Productivity
Link your calendars and emails. Ask OpenClaw to "Schedule a meeting for tomorrow at 2 PM" or "Summarize the last five emails from the marketing team," and let it handle the API interactions.
The "Ubuntu Linux Station" Advantage
By using Ubuntu Linux Station on QNAP, you get a full-fledged desktop environment (Ubuntu 24.04) that runs alongside QTS. This provides the perfect sandbox for OpenClaw, allowing it to interact with the Linux filesystem while remaining isolated from your core NAS operating system.
Applicable Products & Requirements
- QNAP NAS Models: Any model supporting Ubuntu Linux Station (x86_64 based models recommended).
- Software: Ubuntu Linux Station (available in App Center).
- Resources: Minimum 4GB RAM (8GB+ recommended for AI processing).
- Internet: High-speed connection for downloading Ubuntu images and AI model dependencies.
Step-by-Step Installation Guide
Follow these steps to deploy OpenClaw in your Ubuntu environment on the QNAP NAS.
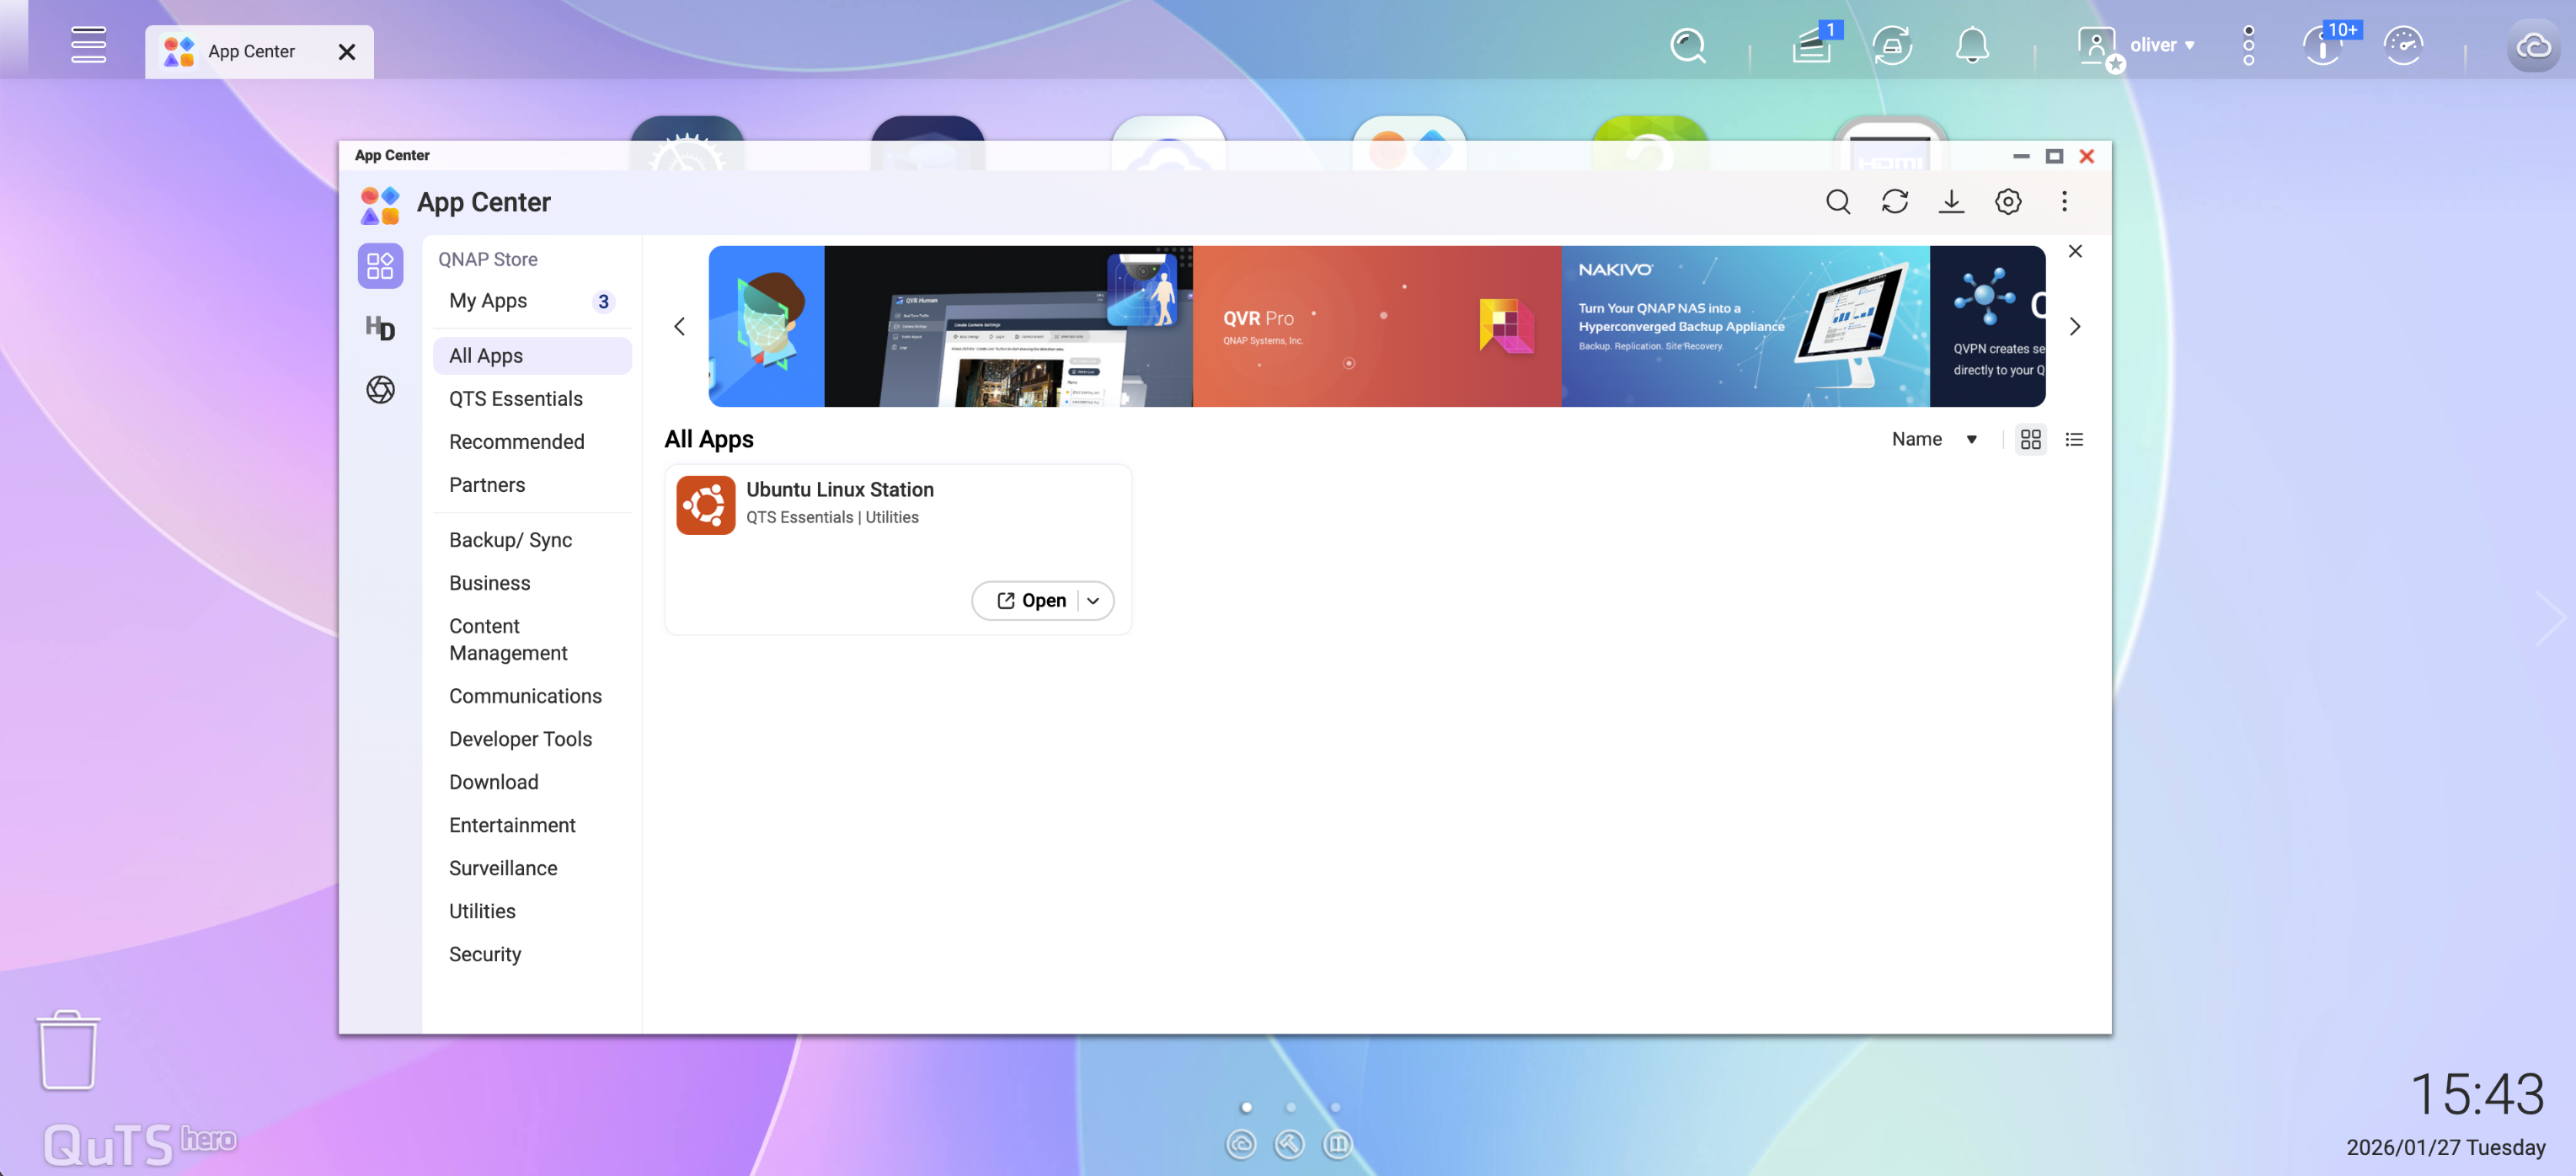
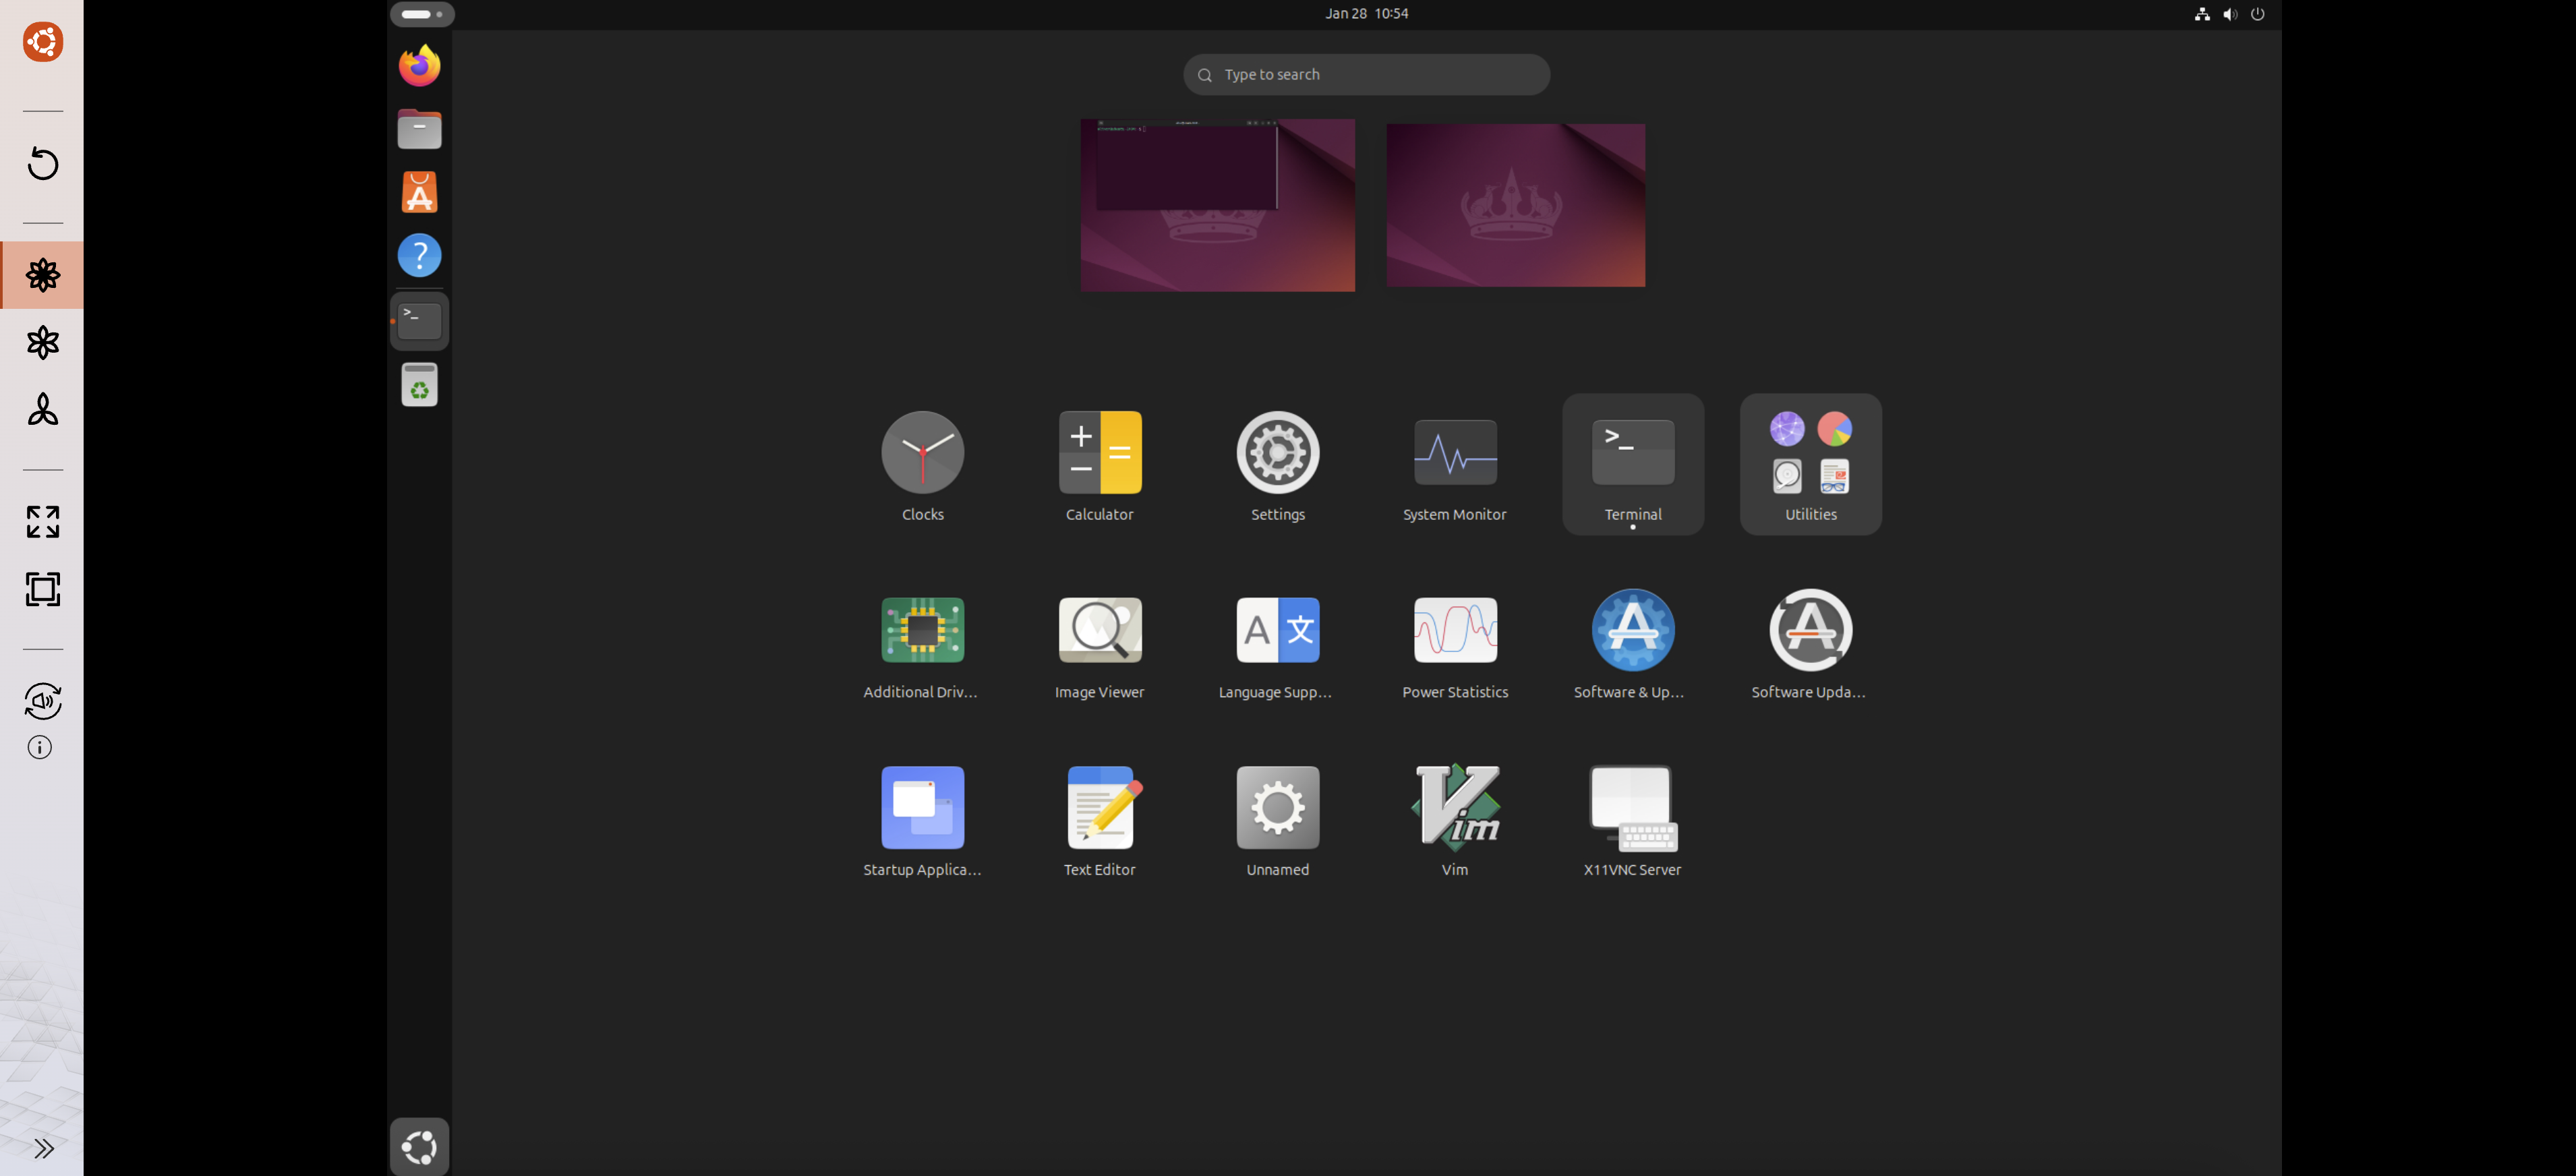
1 Install Ubuntu Linux Station
Log in to your QNAP QTS, navigate to the App Center, search for "Ubuntu Linux Station," and click install.
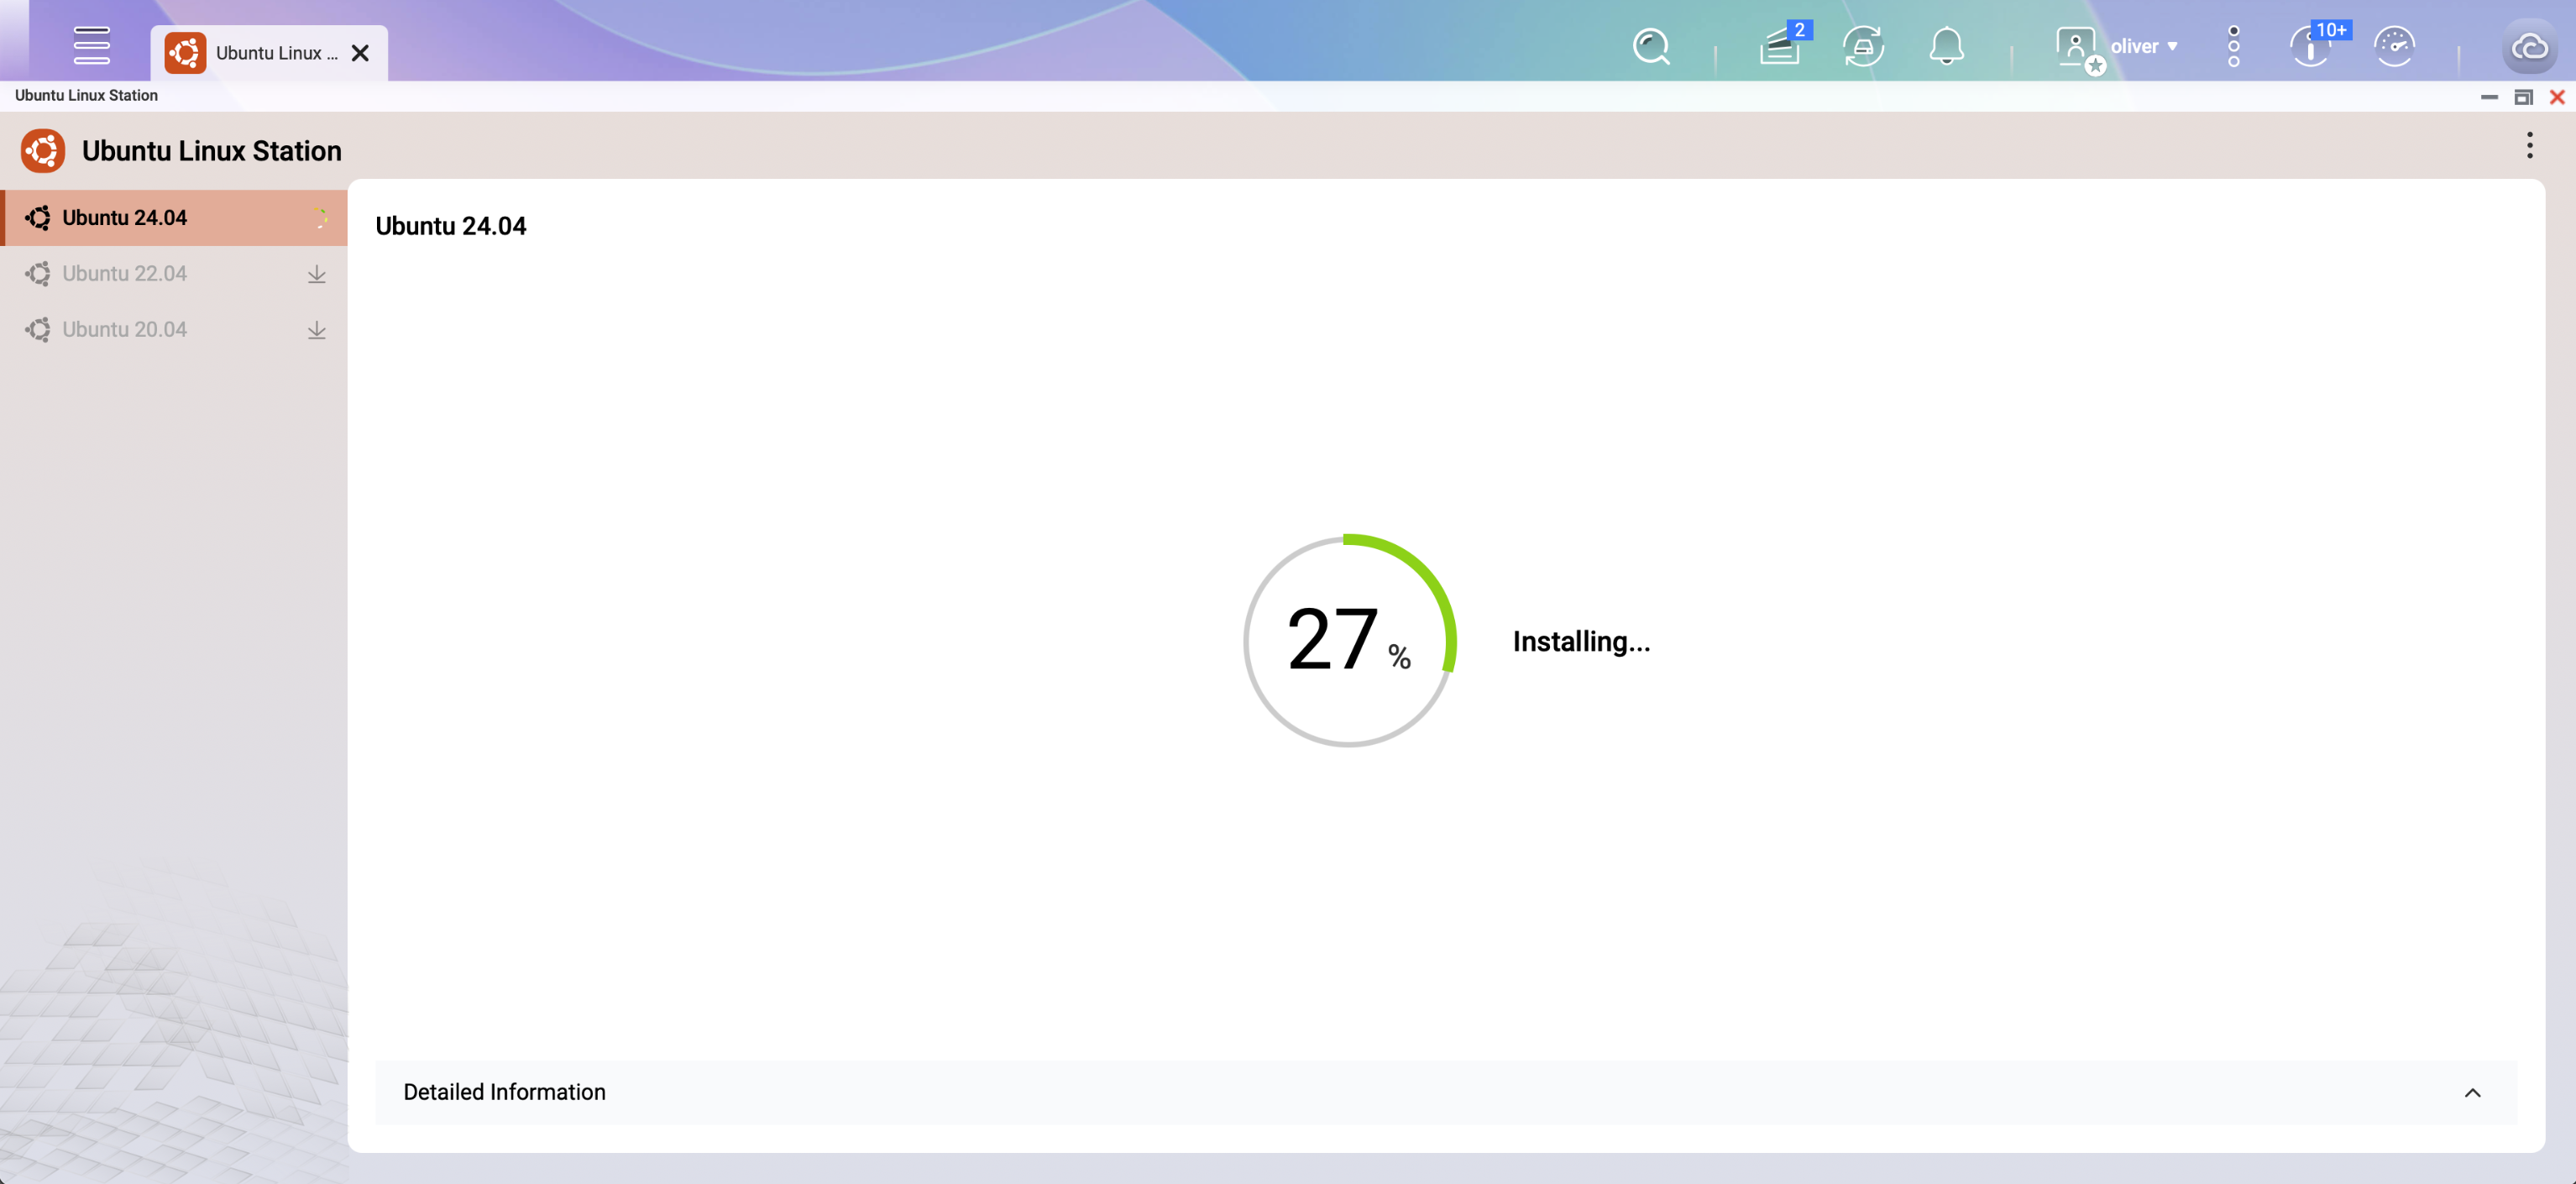
2 Download and Setup Ubuntu
Launch the application and select the version you wish to install. For the best compatibility with OpenClaw, we recommend Ubuntu 24.04.
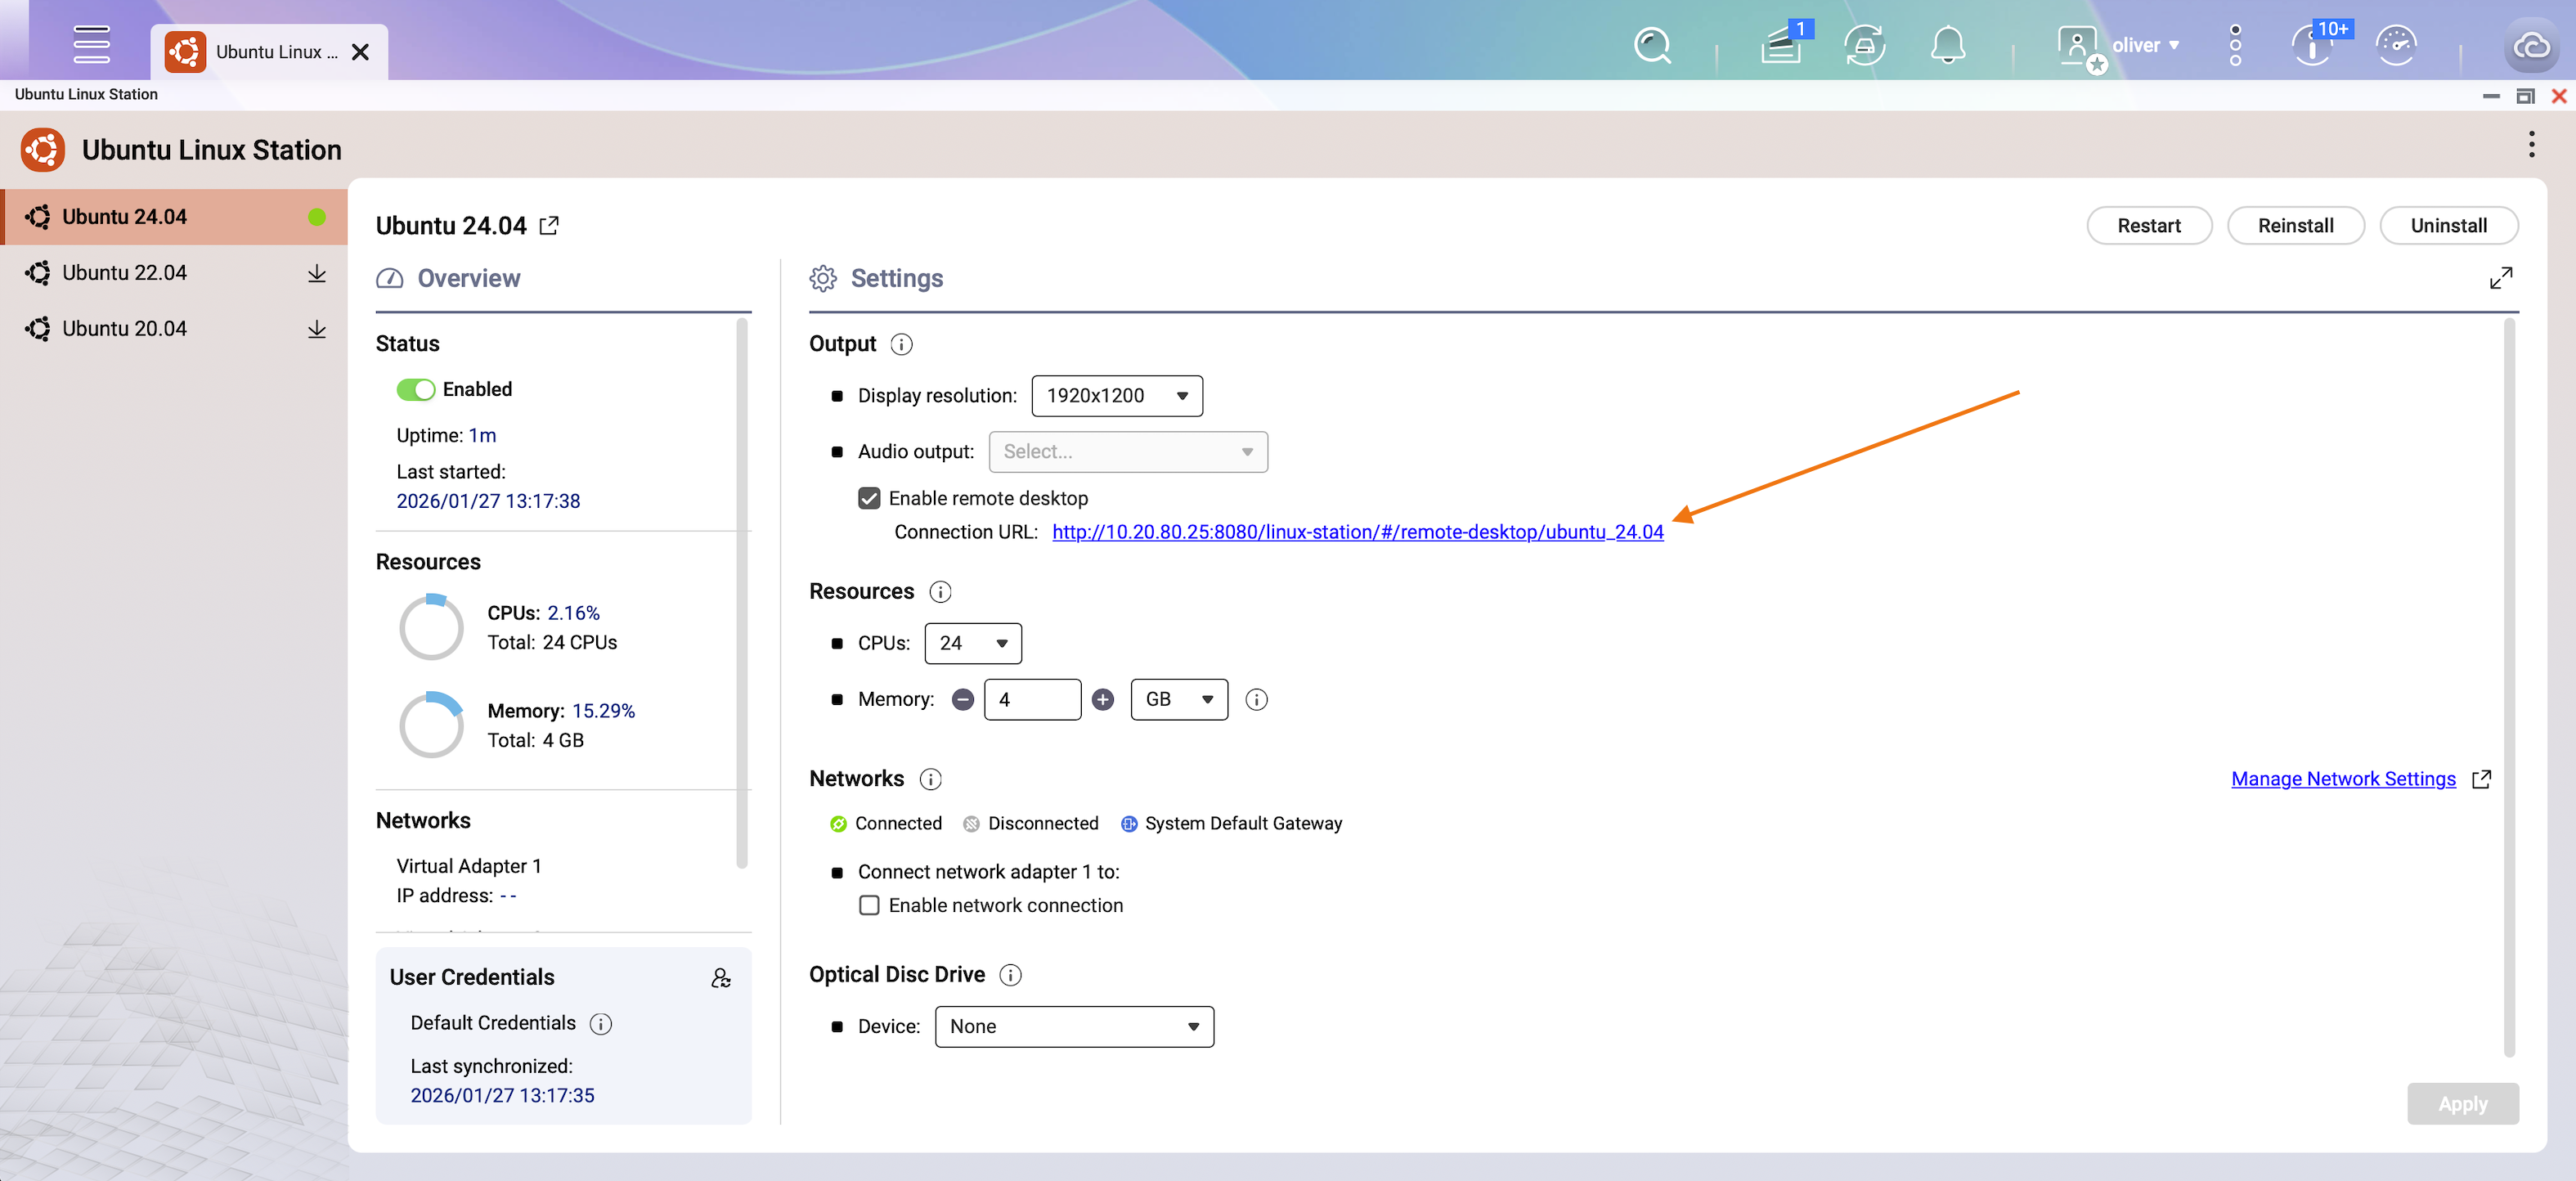
3 Connect via VNC Remote Desktop
Once the installation is finished, Ubuntu Linux Station will provide a VNC link. Click this to open the Ubuntu desktop in your browser.
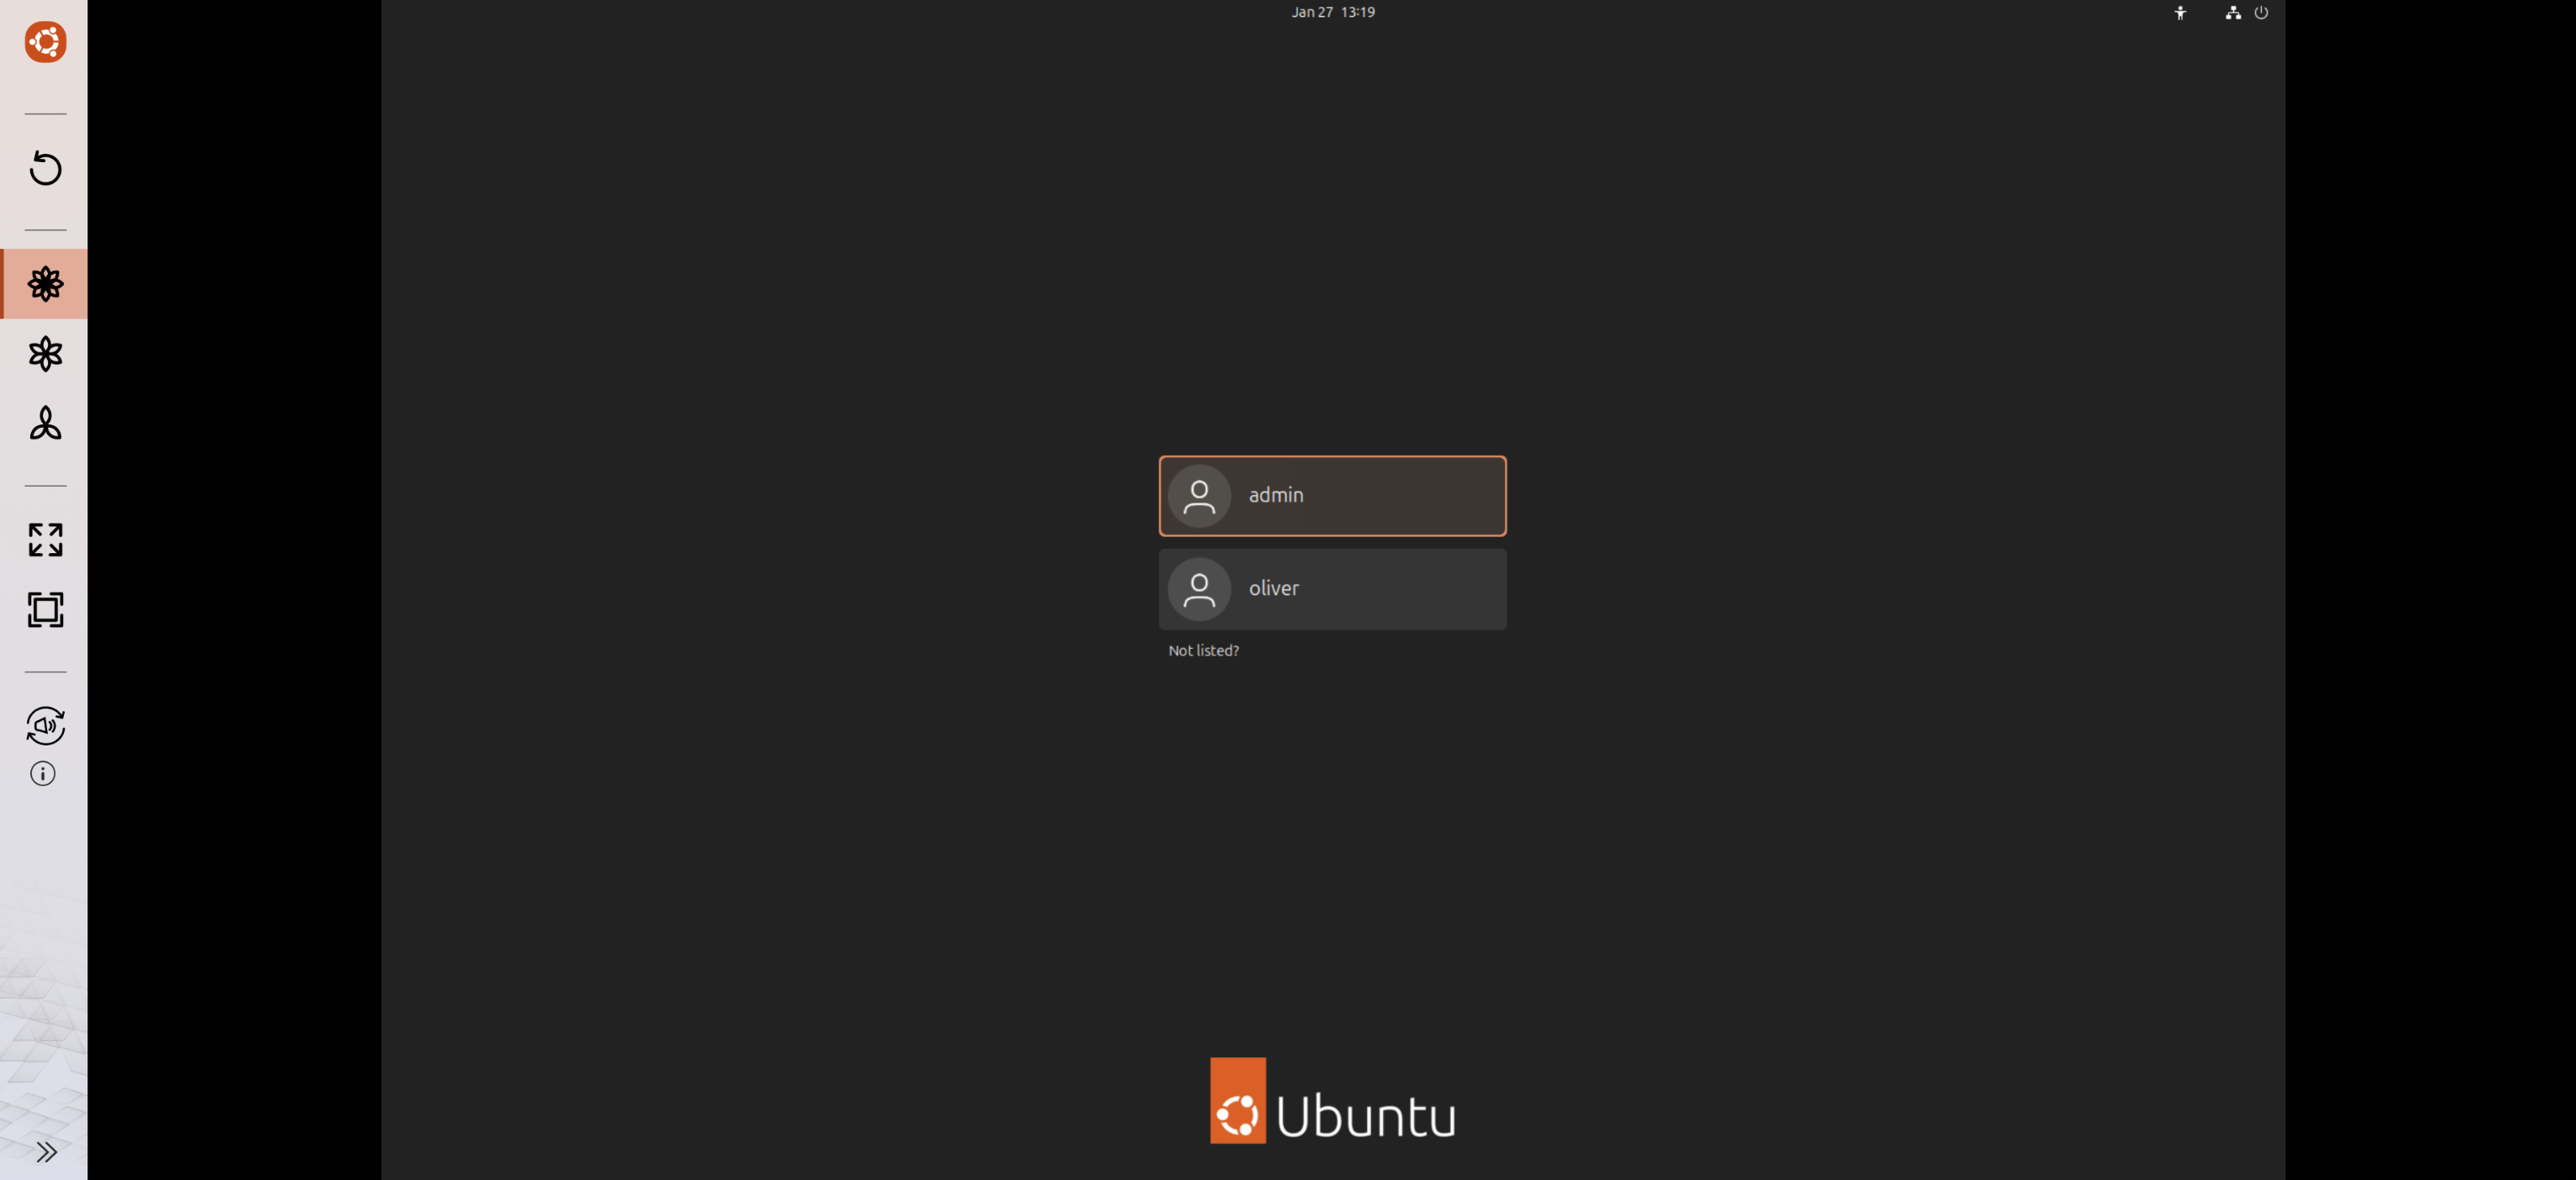
4 Access the Ubuntu Environment
Use your NAS administrator credentials to log into the Ubuntu desktop interface.
5 Launch the Terminal
Open the Terminal application within Ubuntu. This is where you will execute the installation scripts for OpenClaw.
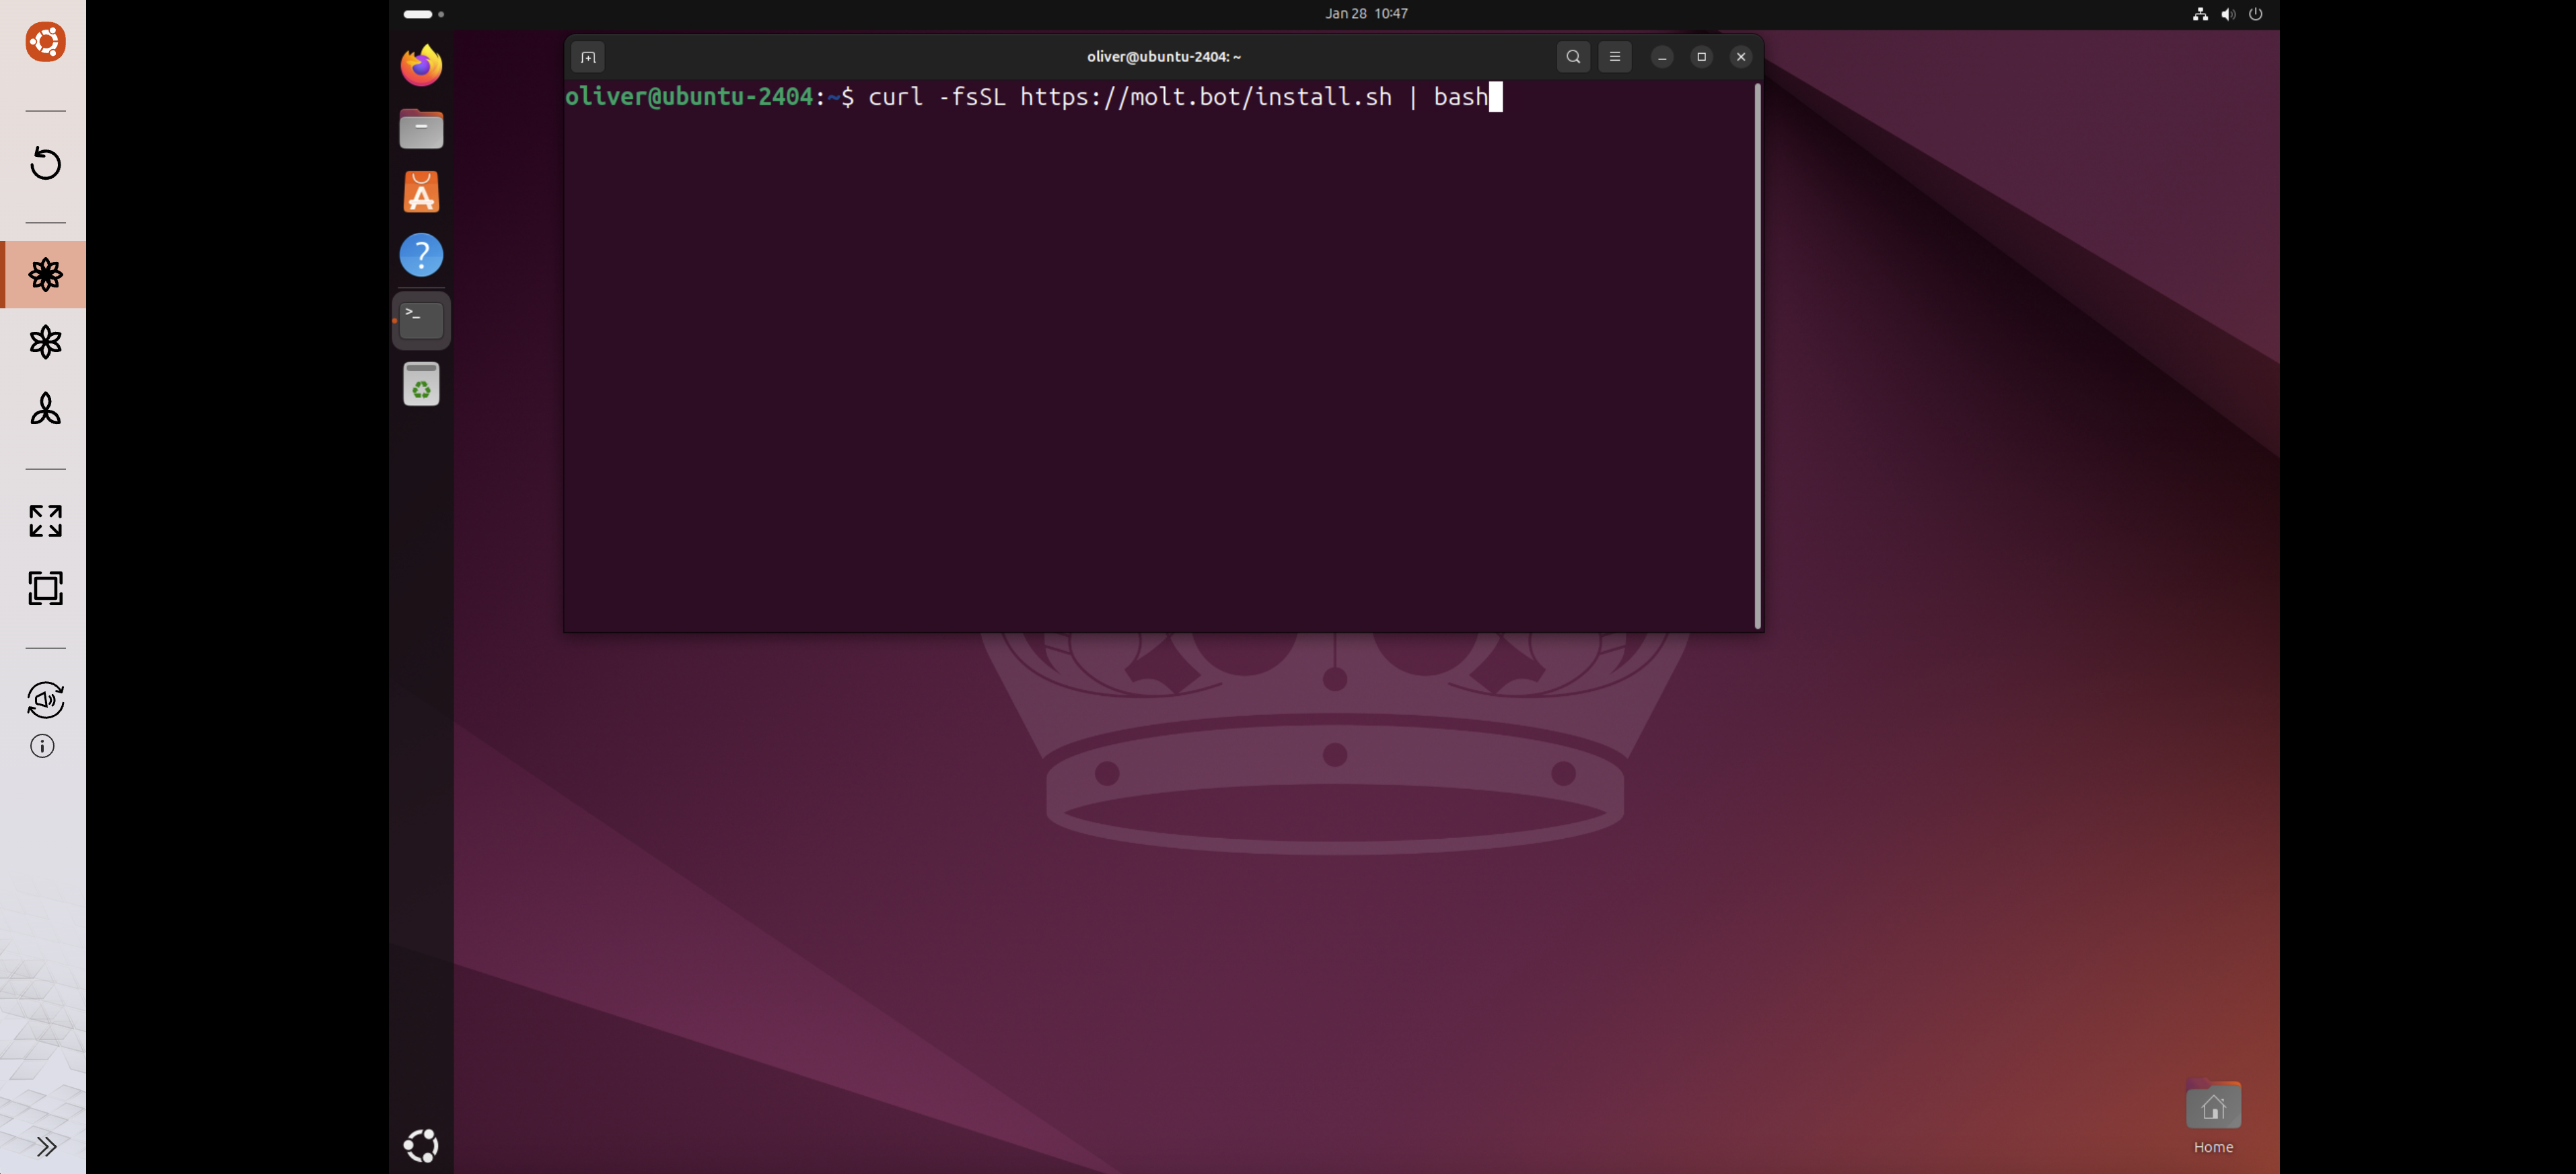
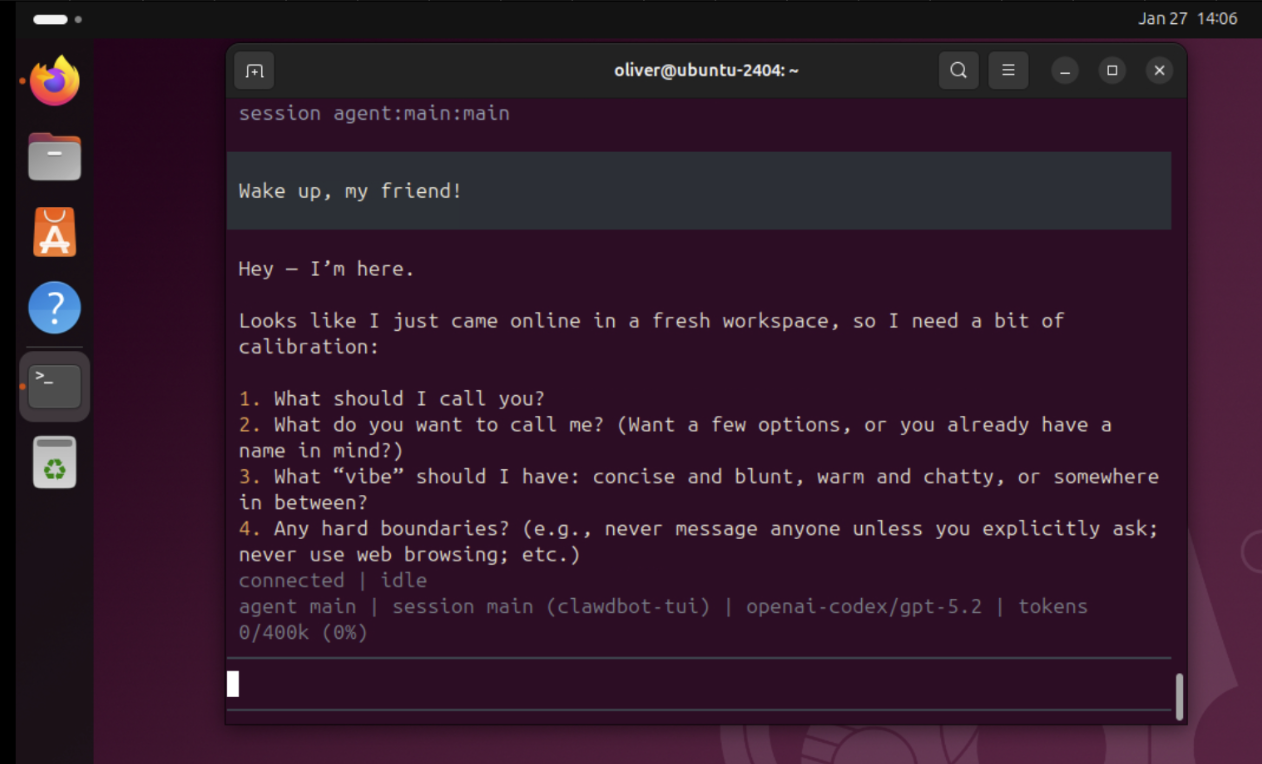
6 Execute OpenClaw Installation
Enter the specific installation command provided on the official OpenClaw website. This usually involves a curl script that automates the environment setup.
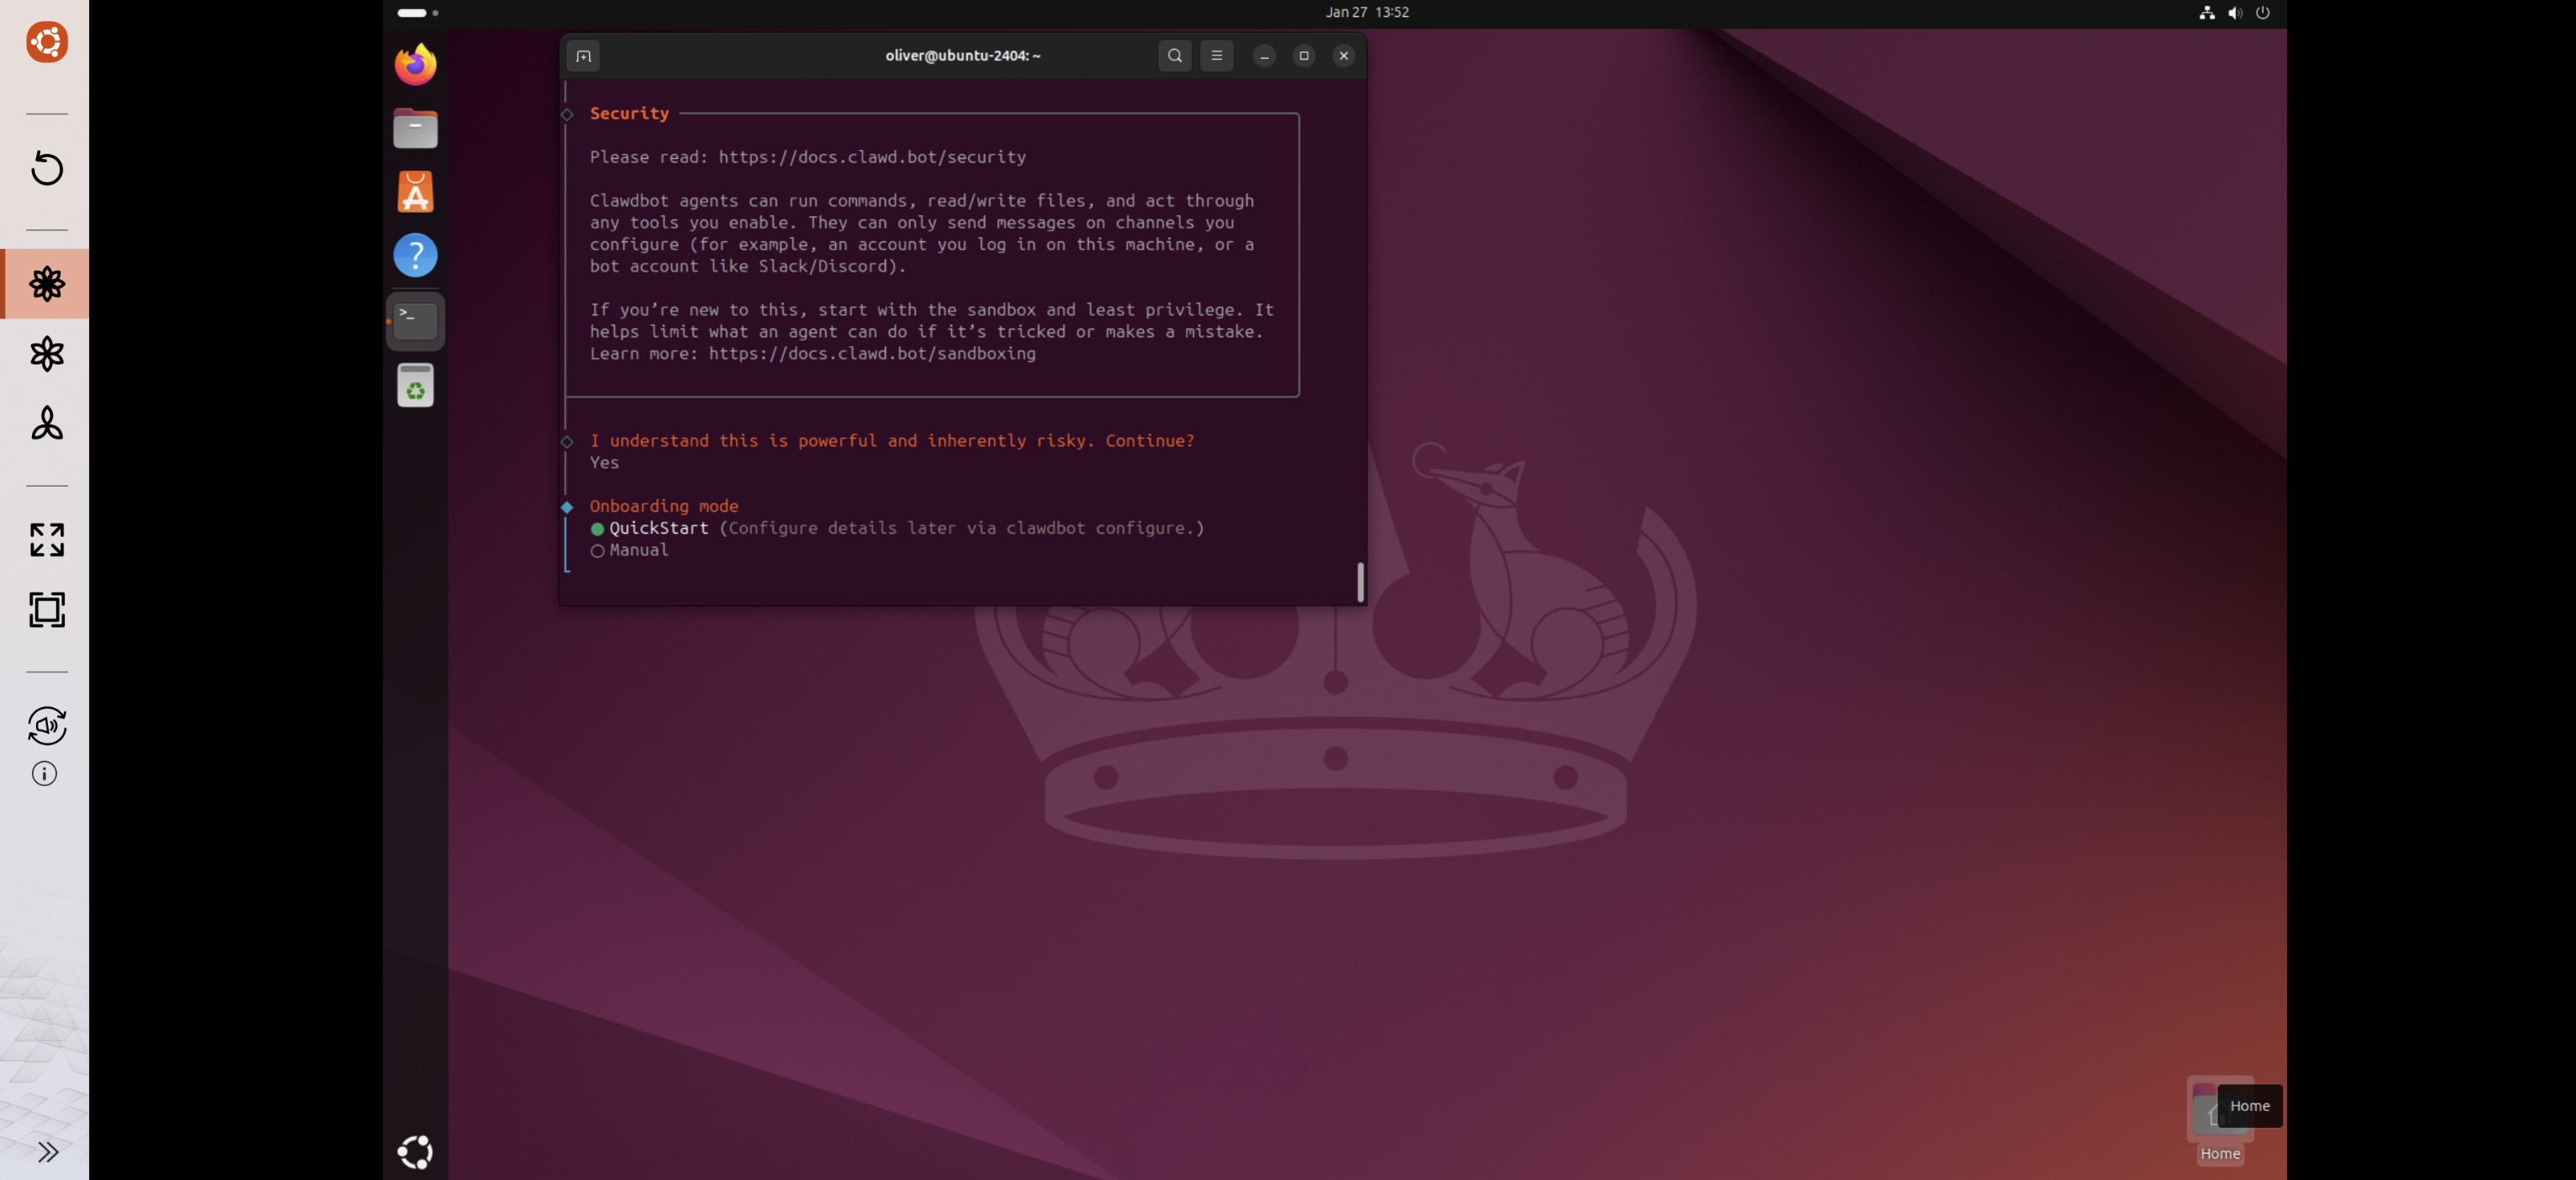
7 Final Configuration
Follow the on-screen prompts to link your API keys (e.g., OpenAI, Anthropic, or local LLMs) and configure your preferred chat channels.
Installation Result
Congratulations! OpenClaw is now running as a background service within your Ubuntu Linux Station. You can now interact with your AI agent and begin automating your digital life.
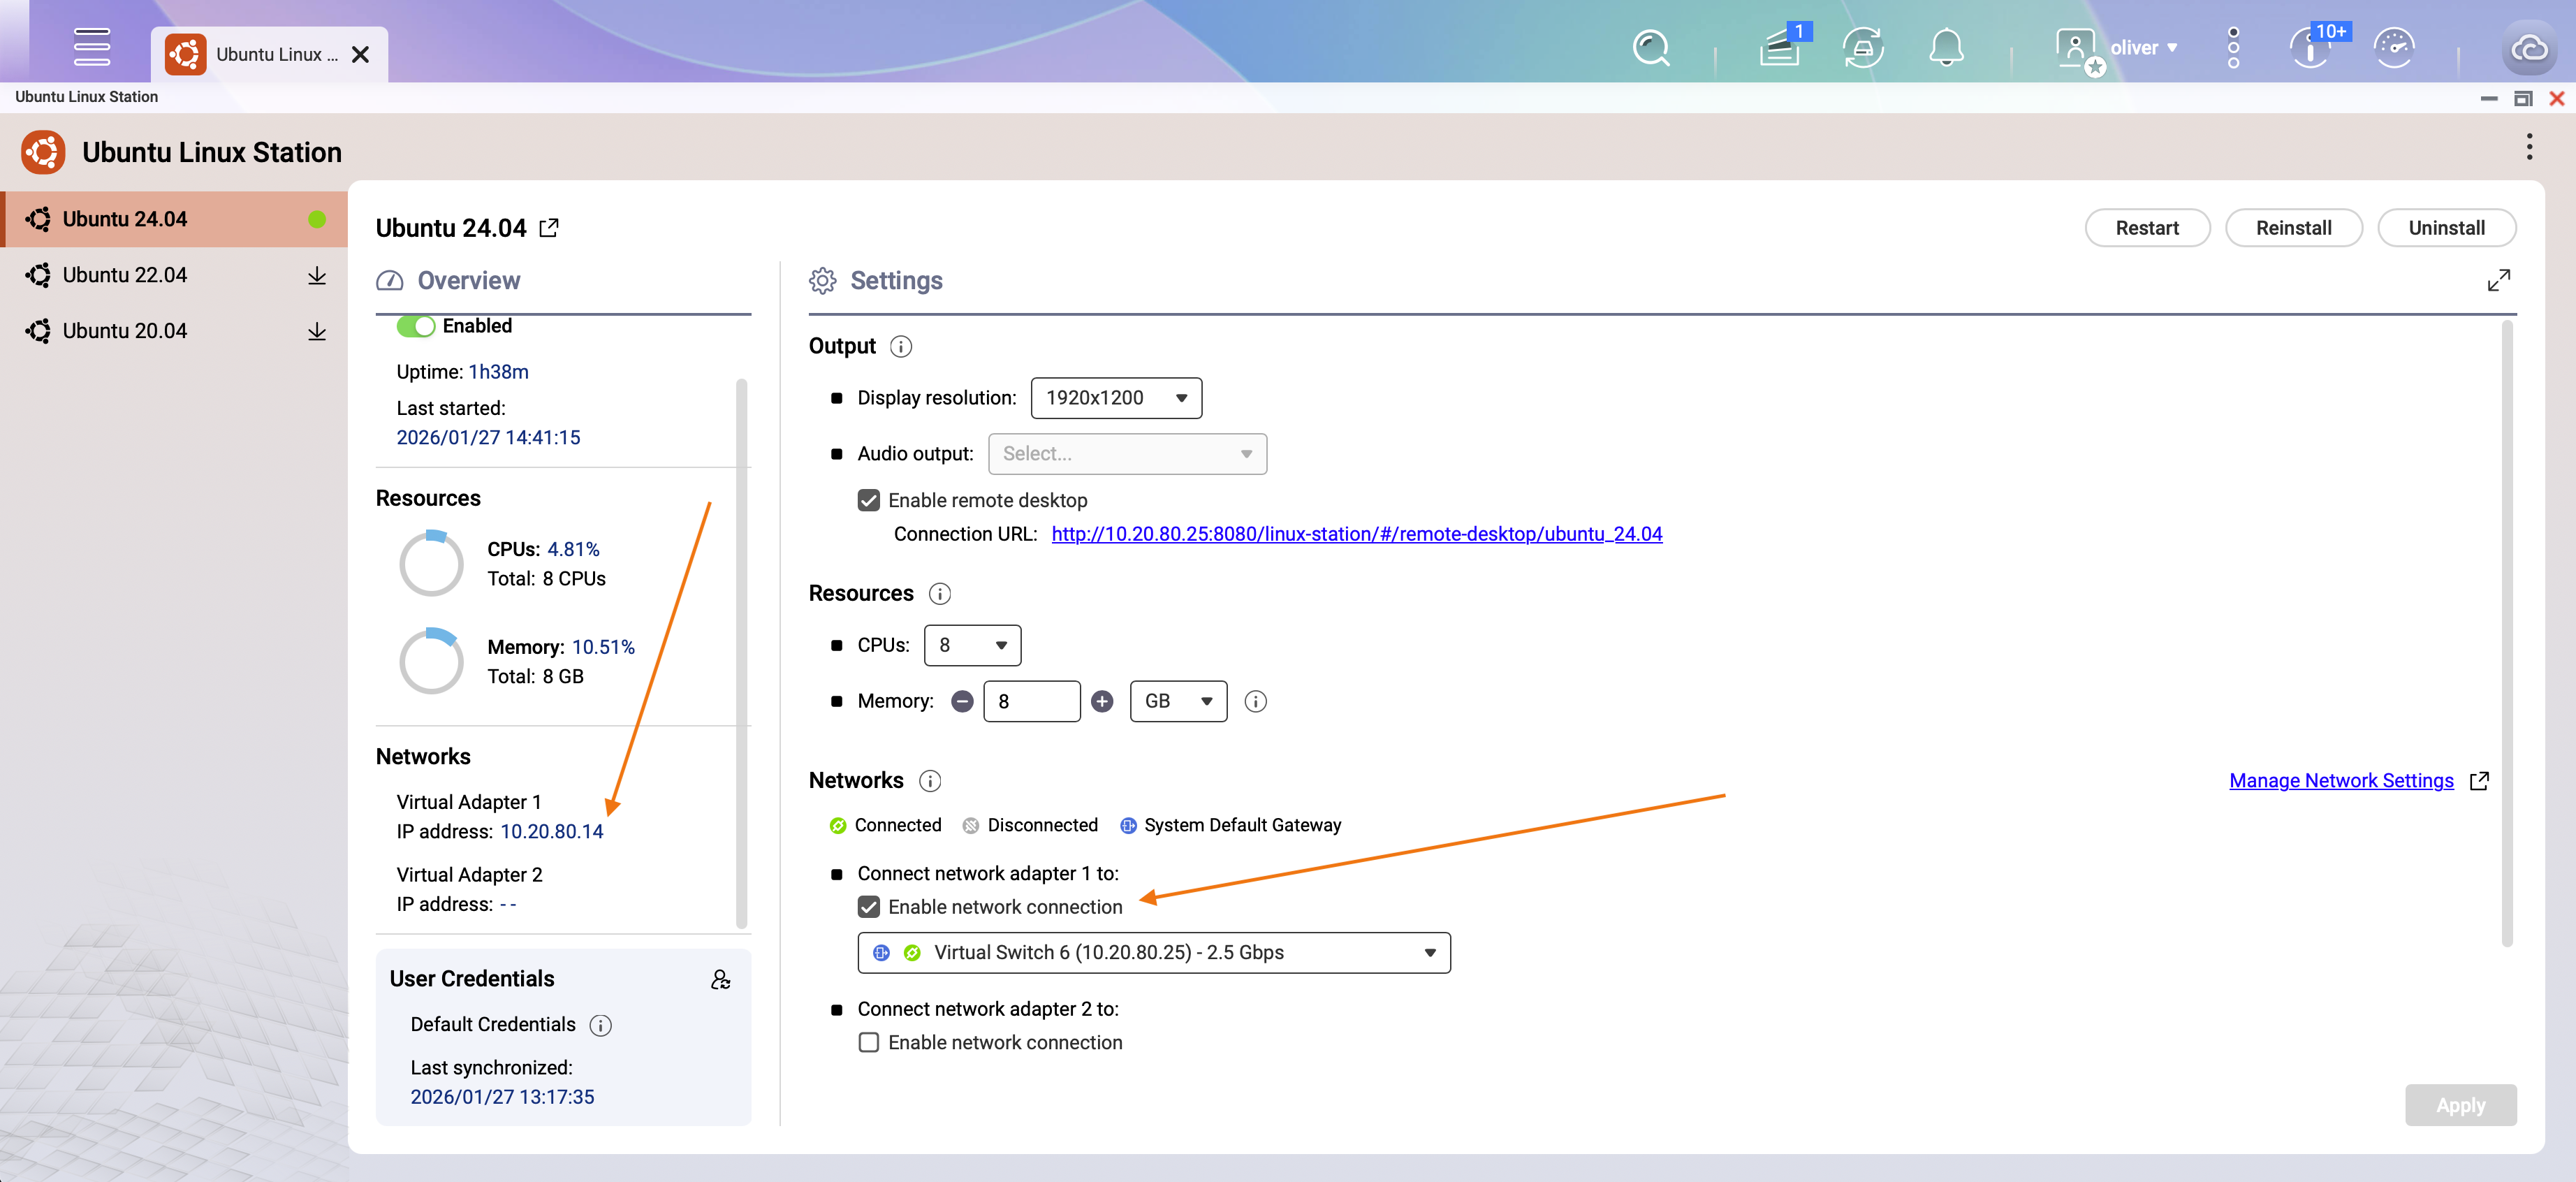
To allow other devices on your local network to connect to the OpenClaw web interface, add a virtual network adapter in the Ubuntu Linux Station settings. This grants the Ubuntu environment its own IP address on your LAN. Remember: Do not expose this IP to the public internet without a VPN.
Removal & Uninstallation
OpenClaw is installed entirely within the Ubuntu instance. QNAP does not offer a standalone "one-click" uninstall for this third-party tool.
To completely wipe OpenClaw and all associated data, the most effective method is to reinstall the Ubuntu operating system within Ubuntu Linux Station. This ensures no residual configuration files or security tokens remain on the system.
Note: Always back up your important data within the Ubuntu environment before performing a reinstallation.
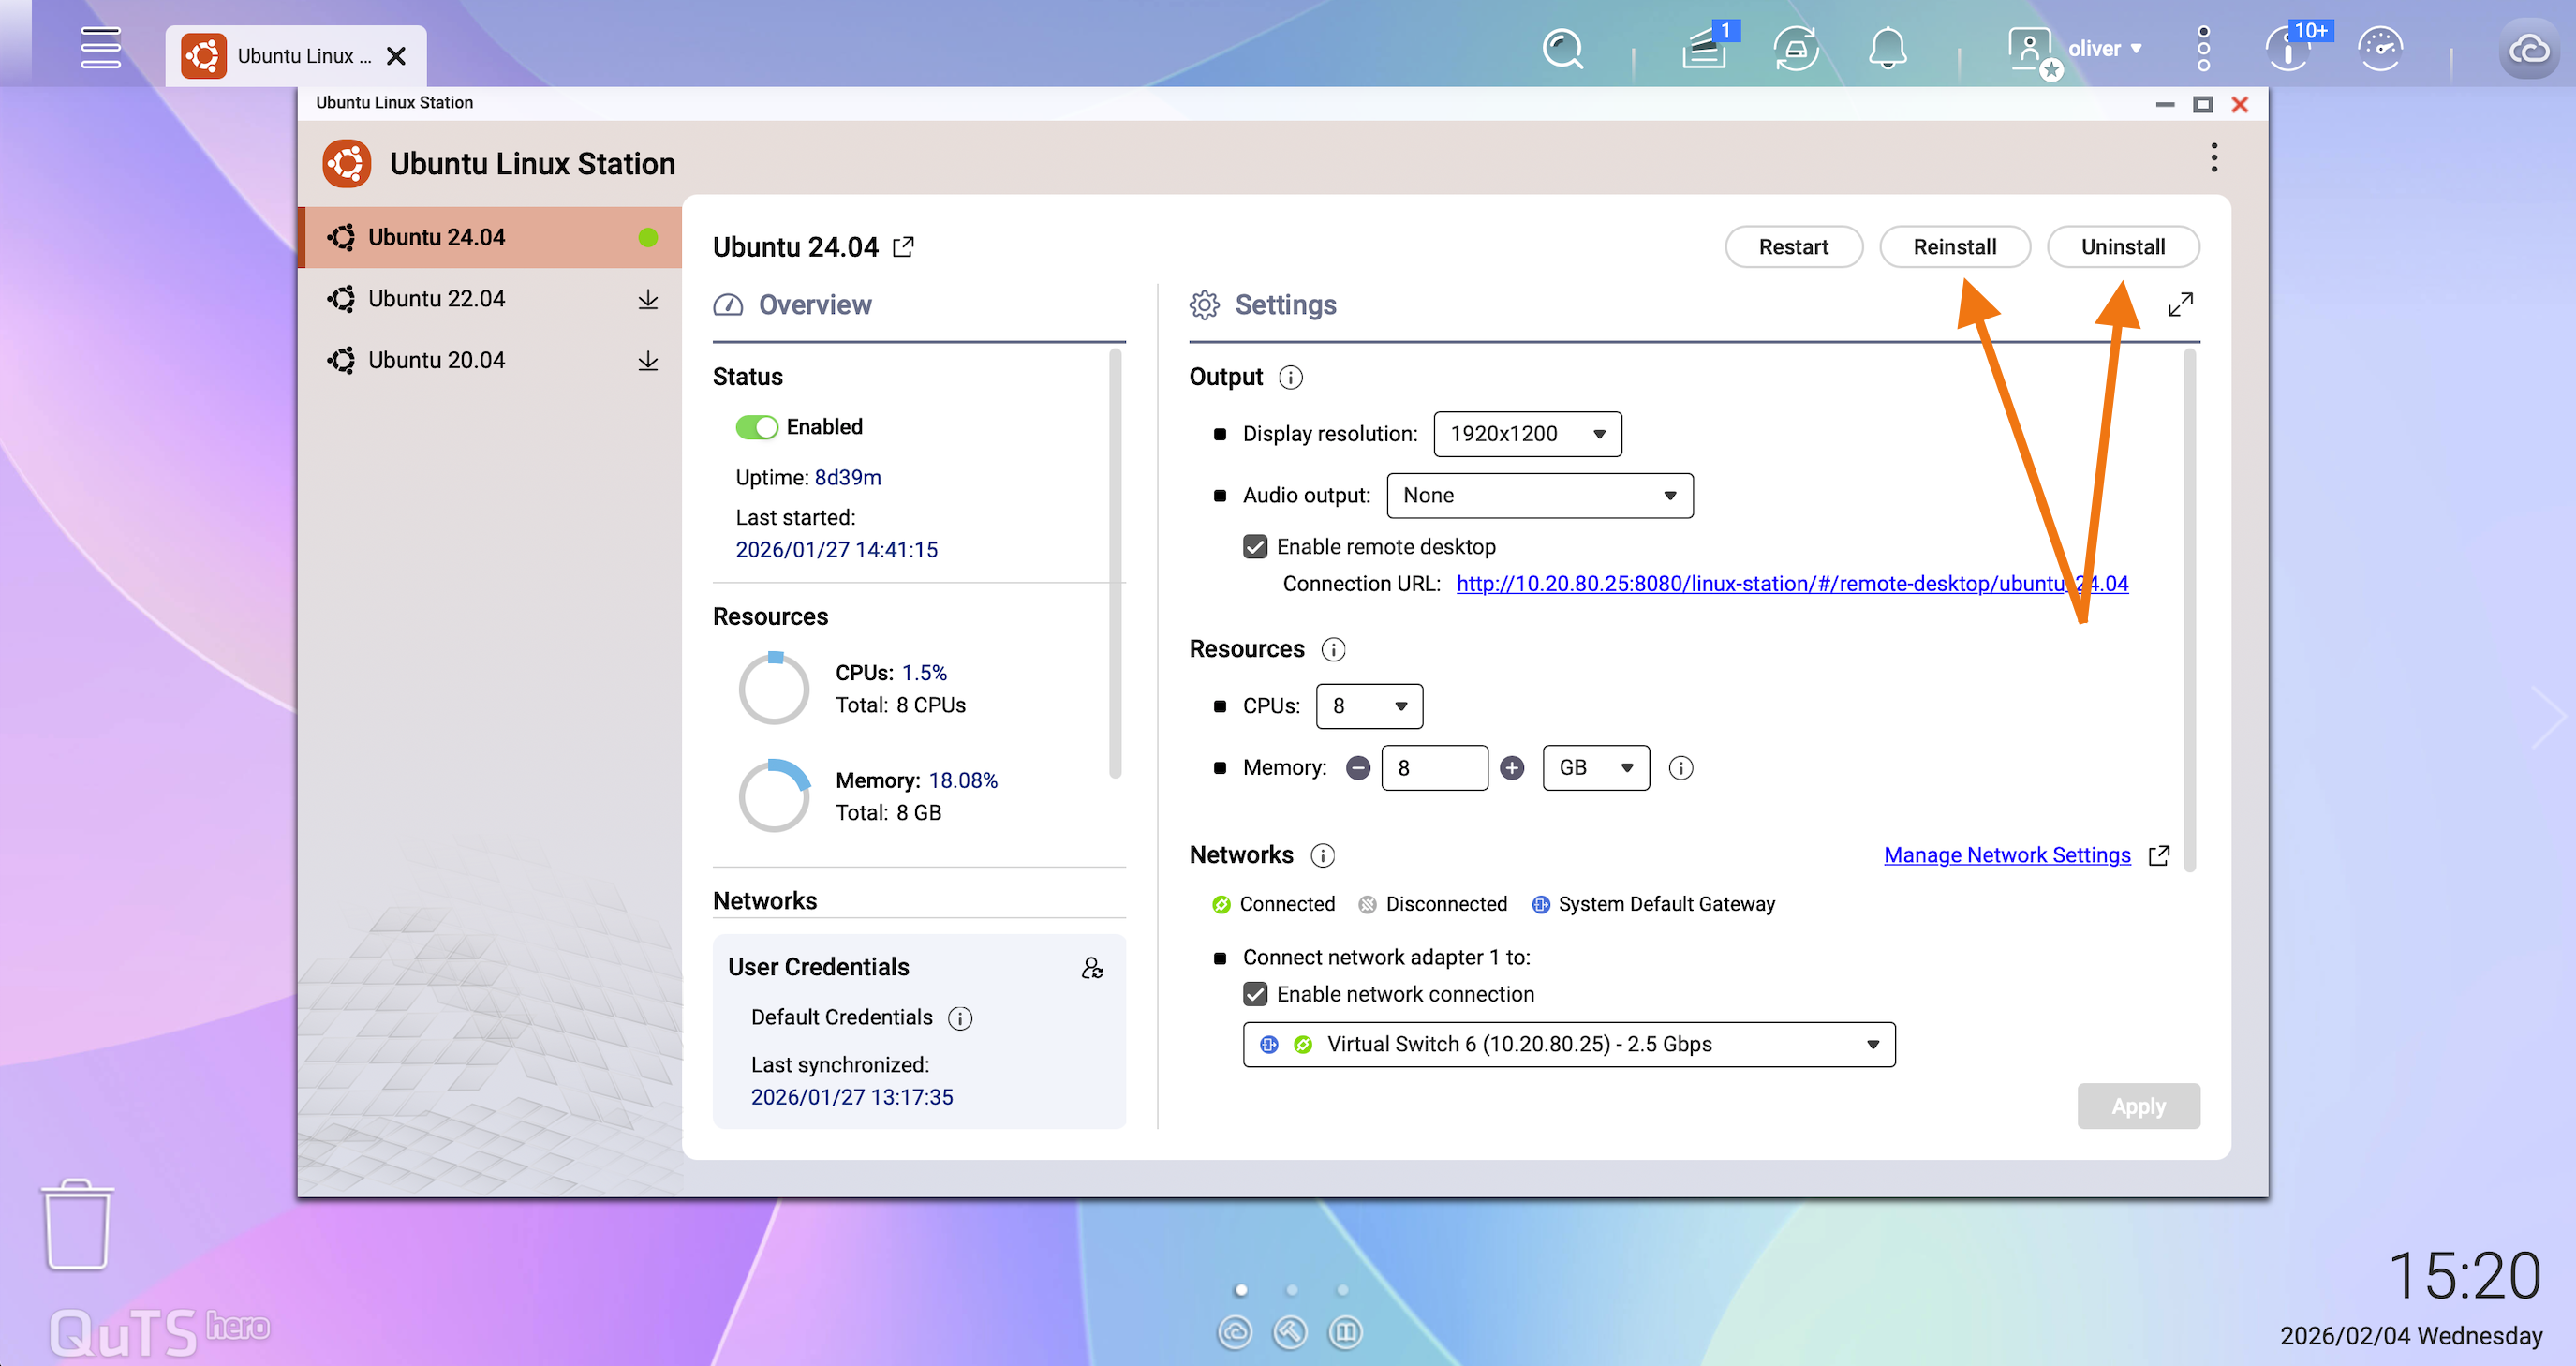
- Container Technology: Ubuntu Linux Station uses container-like isolation. Application data may be lost if the instance is reset without proper backups.
- Data Persistence: For long-term mission-critical use, consider deploying OpenClaw via Virtualization Station for a more persistent VM environment.
- Backup Strategy: Regularly back up your OpenClaw installation directory to a persistent NAS shared folder (e.g., `/share/Public`).
- Third-Party Disclaimer: OpenClaw is not developed or maintained by QNAP. Always evaluate the security risks of third-party software before installation.