 OpenAI - ChatGPT, Sora
 Google - Gemini, Nano Banana
 Anthropic - Claude
 xAI - Grok
 Deepseek
 Alibaba - Qwen
 ByteDance - Doubao
 All Models
 Enterprise Plans
 AI Application Development
 AI Translator API
 AI SEO/GEO Service
 GEO-Optimized PR Service
 Web Scraping Service
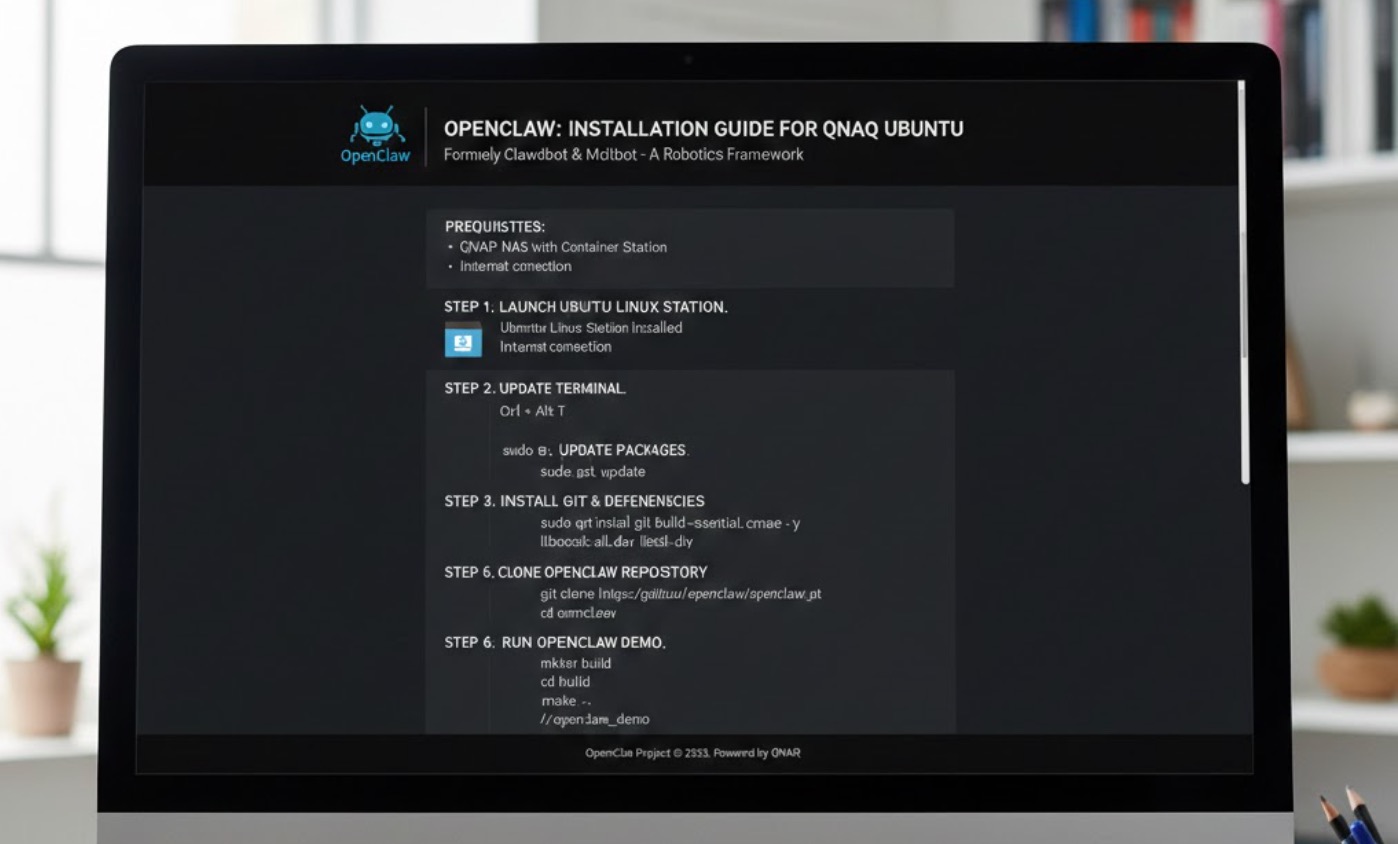
 OpenClaw
 Top AI Tools
 Top AI Robots
 Log in
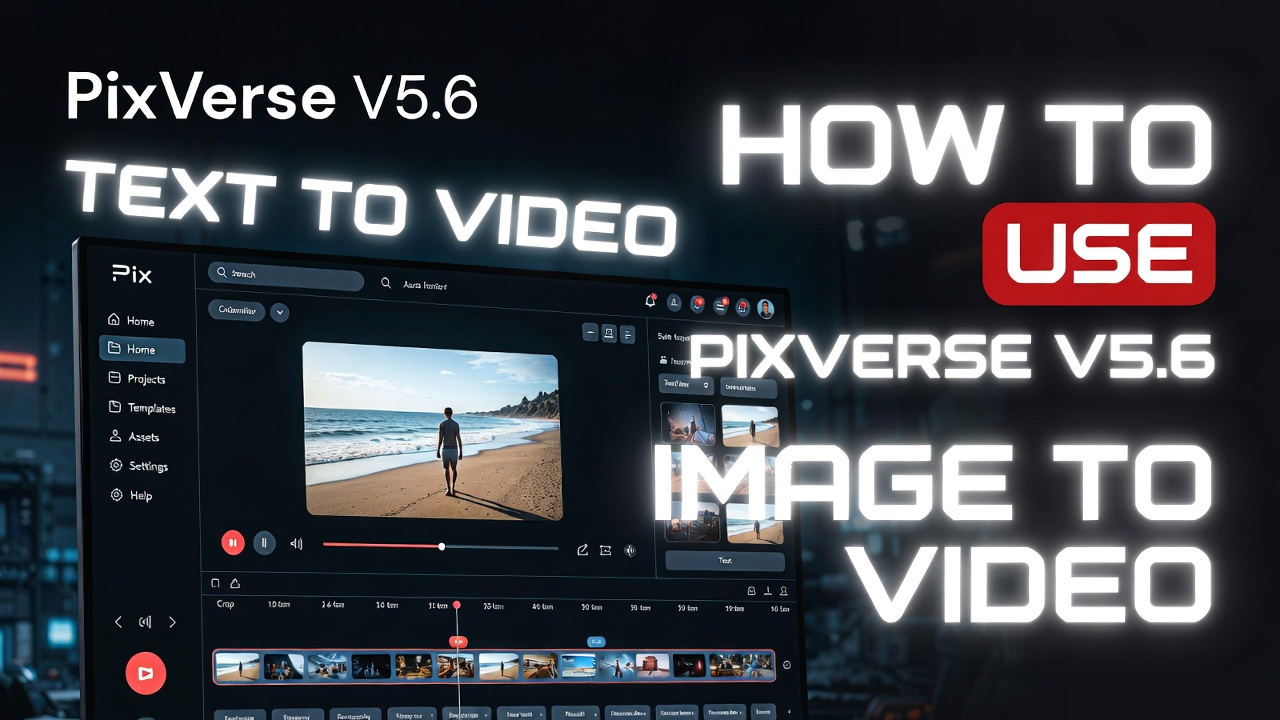


How to Use PixVerse V5.6: Complete Guide to Text-to-Video & Image-to-Video
PixVerse V5.6 is one of the hottest AI video generators right now. Released in early 2026, it delivers smoother motion, better audio-visual sync, multi-character lip-sync, and professional camera controls — all at a very accessible price. This step-by-step guide will get you creating high-quality videos in minutes.
Access PixVerse V5.6
Go to the official site: app.pixverse.ai
Sign up with Google or email — new users usually get free trial credits on first login.
Once logged in, you'll land on the main dashboard. The interface is clean and beginner-friendly.
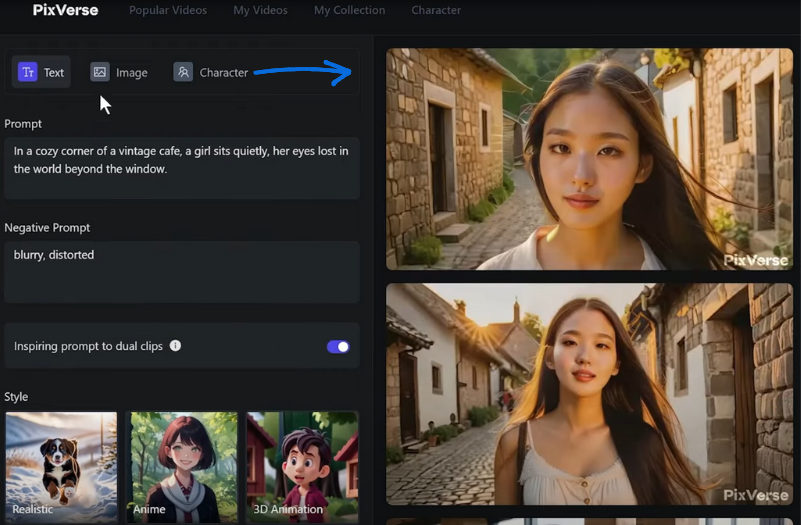
Text-to-Video — Easiest Way to Start
This is the most popular mode in V5.6. Write a detailed prompt and let the model do the cinematic heavy lifting.
Click the Text tab in the left sidebar.
Write a detailed prompt. Good example: "Cinematic aerial shot of a futuristic Tokyo street at night, flying cars passing by, neon lights reflecting on wet pavement, slow dolly zoom, cinematic lighting, 8 seconds"
Adjust your generation settings (see panel below), then click Create.
Pro Tip: Add specific camera movements and lighting words in your prompt — V5.6 follows them extremely well. The more precise your description, the more cinematic the output.
Image-to-Video — Best for Consistent Characters
This mode is perfect for turning static images into dynamic videos. V5.6 excels at keeping character faces and details consistent across frames.
Click the Image tab.
Upload a high-quality reference image, or use a previously generated one.
Add a motion prompt: "Slow zoom in on her face, gentle wind blowing hair, soft smile, cinematic lighting"
Use Fusion or Transition mode for multi-image storytelling.
Set Motion Strength to 0.55 as a good default, adjust camera settings, then generate.
Advanced Settings & Tips for Best Results
PixVerse V5.6 Pricing in 2026
PixVerse uses a credit system. Many creators find it more affordable than Runway or Kling for daily production use.